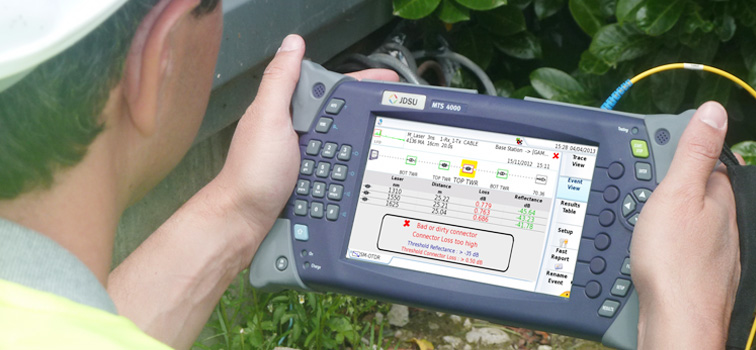
OTDR, the optical time domain reflectometer, is the most important investigation tool for optical fibres. It’s applied in the measurement of fibre loss, connector loss and for the determination of the exact place and the value of cable discontinuities. It’s the only device which can verify inline splices on concatenated fibre optic cables and locating faults.
To know how to use OTDR for the fibre investigations, first you should know the structure and working principle of OTDR equipment. When a short light pulse transmits into the fibre under test, the time of the incidence and the amplitude of the reflected pulses are measured. The commonly used pulse width ranges from nanosecs to microsecs, the power of the pulse can exceed 10 mW. The repetition frequency depends on the fibre length, typically is between 1 and 20 kHz, naturally it is smaller for longer fibres. The division by 2 at the inputs of oscilloscope is needed since both the vertical (loss) and the horizontal (length) scales correspond to the one-way length.

Besides, to use an OTDR successfully, you should also know how to operate the instrument. The following is about the experiences collected from some experienced people who use OTDRs during installation and for maintaining telecommunication networks.
Before use OTDR, first, you should watch out if the connectors are clean. If it’s dirty, then clean it. Otherwise, it will make measurements unreliable, noisy or even impossible. What’s worse, it may damage the OTDR.
Check whether the patch cord, the module, and the fibre under test are single-mode or multimode. To test the patch cord, activate the laser in the CW (Coarse Wavelength) mode and measure the power at the end of the patch cord with a power meter. This should be between 0 and – 4 dBm for most single-mode modules and wavelengths.
The range is the distance over the cable which the OTDR will measure. The range should be longer than the cable you are testing. For example, if your link is 56.3 km long, choose 60 km. For distances greater than approximately 15 km, make your first measurement in longhaul mode, otherwise use shorthaul.
Usually single-mode is set for 1310 nm or 1550 nm, and multimode is set for 850 nm or 1300 nm.
Averages of Noisy Traces
If the trace is very noisy, increase the number of averages. Usually 16-64 averages are adequate. To improve the signal to noise ration of the trace, the OTDR can average multiple measurements, but averaging takes time. So try to average over a longer time.
In this mode, you can modify parameters only if you stop a measurement explicitly. So it avoids you to erase a trace averaged over a long time by accident. You use realtime mode to check your connection, the quality of splices, and whether a fibre is connected. Start in automatic mode, then switch to realtime mode and select the most suitable parameters.
If you know the exact physical length of the fibre under test, you can measure the refractive index. Start with the refractive index 1.5000. Place a marker at the end of the fibre. Then select the refractive index function and adjust it until the displayed marker position is equal to the known fibre length. Then, the effective refractive index will be displayed.
Single-mode fibres (1550 nm) are very sensitive to macrobending such as a tight bend or local pressure on the cable. It doesn’t always happen at this wavelength of 1310 nm. So characterise your link at both wavelengths.
OTDRs are invaluable test instruments. Maybe a small mistake will cause serious damage to this equipment. So before use it, you should better know it as detailed as possible to avoid any loss because of innocence and make full use of it in optical fibre events.
Related article:
How to Choose a Right OTDR?
OTDR Selection Guide
