Tag Archives: server rack

What Is Open Frame Rack and How to Use It?

There are many different types of server racks on the market, like open frame rack, server cabinet, and rack mount and wall mount enclosures. Open frame rack, thanks to its reasonable price, and material saving, has attracted more and more customers. It is more convenient to ship and be packed. To help you better understand the open frame rack, this article will introduce it in three aspects.

Brief Introduction of Open Frame Rack

The open frame rack is an equipment to mount your servers and other network equipment. When you deploy equipment and organize cables in a computer room or data centre,it is important to make proper and reasonable space utilization. Therefore, open frame server racks come at a right time to help stay organized in a cost-effective manner. Here I list four benefits of open frame server racks and why you should consider them for you equipment storage needs.

2-post open frame rack

Benefits of Open Frame Rack

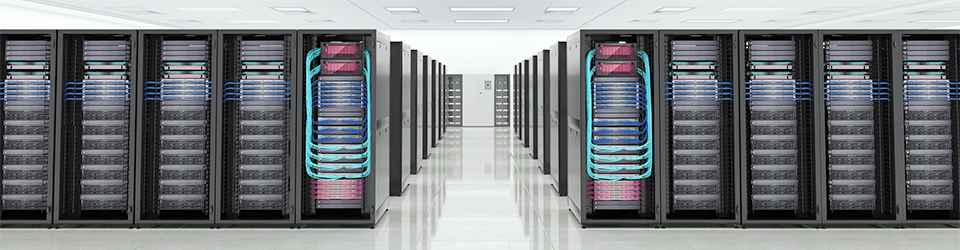
Better Cable Management

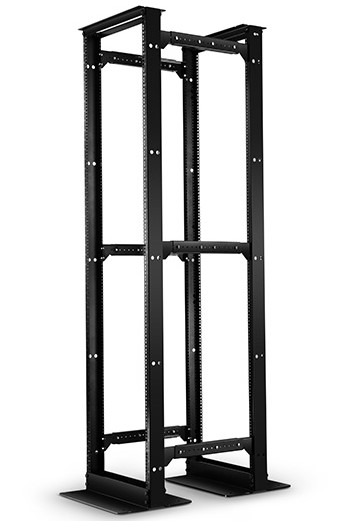
The fact that you may run the cables with obstacles from doors and panels won’t frustrate you when using an open frame rack. It is just formed by 2-post racks or 4-post racks with no limitations to each orientation. With this rack, you will not consider whether it can contain all your applications within the space any more.

Airflow

The enclosed racks are not easy for ventilation. Open frame server racks, on the other hand, allow for unrestricted airflow, preventing heat build-up. The proper cooling is conducive to the running of the whole system.

Easy Access

Without barriers, you can access to every equipment and route cables freely in every direction you want. And all the organs and working status are visible to you for real-time monitoring.

Cost

Open frame server racks are a cost-effective way to manage equipment, compared to enclosed racks. For example, the 45U 4 post open frame server rack sells at $300 and 2 post one $210, much cheaper than the 45U server cabinet selling at $650. The cost of producing and shipping is less than those of closed cabinet or server racks.

How to Use Open Frame Rack?

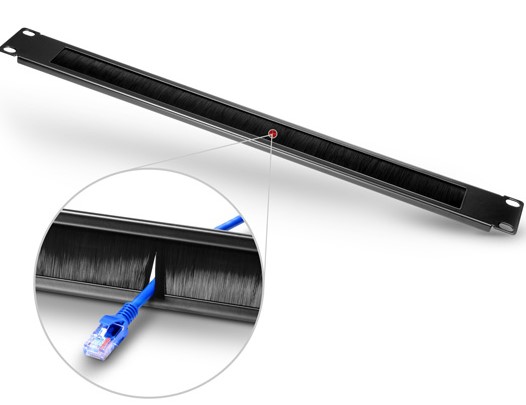
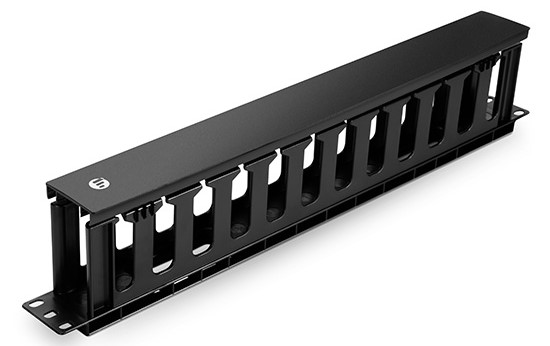
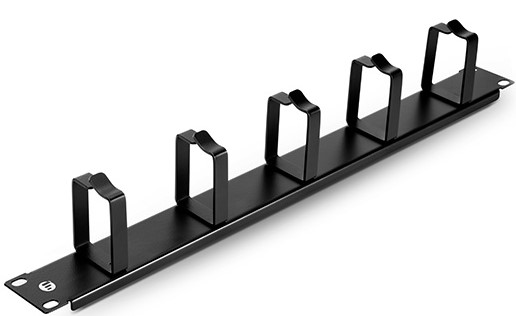
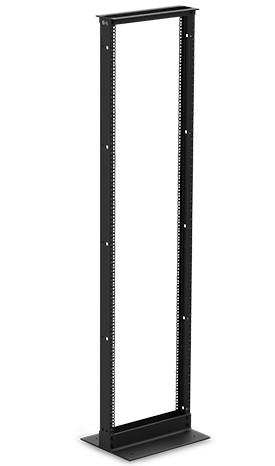
Take the FS.COM 45U 2 post open frame rack as an example, there are many mounting holes on the two posts on which you can attach different devices like cable organizer and patch panel rack in 19’’ standard. You’d better put it on the flat ground lest it fall down.

4-post open frame rack

The bold innovation, server rack without doors and panels, has been warmly welcomed by customers. Apart from the open frame rack, FS.COM offers a variety of racks and enclosures to meet your different applications and conditions. We aim to provide you with high quality products with reasonable price and best service. And we will forge ahead to deliver more versatile products to optimize your experience. If you are interested, follow us. We will release latest news of our achievements on products.

Things You Should Know About Patch Panel Cabinet

Cables are in the right position. Patch panels are terminated. All slack cables are put orderly in the cable manager. Let’s see what is missing? Well, where should the patch panels and cable managers be? Just lying on the ground? If indeed, the previous efforts for cable management is wasted. Just with a cabinet or a server rack, you can solve the problem. There are thousands of cabinet for different use, but here we refer to the network patch panel cabinet.

Network Patch Panel Cabinets Introduction

We have wall mount cabinets that has the maximum height of 12U and the normal cabinets standing on the ground that can reach to 45U. Unlike the open frame rack which consists of two or four mounting rails (called posts) without sides or doors, the wall mount cabinet is enclosed by SPCC cold roll steel panels and a glass front door to make its inside visible. The side panels can be removed easily for quick access to equipment and cabling. On the top of the patch panel cabinet, there is a cooling vent to ensure smooth airflow, preventing over-heat in it to further protect equipment. It is designed to house the 19-inch standard that is consistent with most patch panels in FS.COM or non-standard network equipment as well as network accessories. The wall mount cabinet is shipped fully assembled and is ready to mount to the wall.

As for the floor-standing network patch panel cabinet, the ventilation can be naturally achieved as the front door is perforated and the top panel is attached with brush guards to prevent over-heating. It has four casters helping with its move. Top, bottom and back cable access openings provide convenient and multiple cable routing choices to and from the patch panel cabinet.

Layout Inside the Patch Panel Cabinet

We all know that all patch panel are put in the cabinet, be it fibre optic patch panel or Ethernet patch panel. However, the question is whether it is on the front side or back and with the jacks facing in or out?

In most cases, we will start with an empty patch panel cabinet, and then install the devices on its front rails from top to the bottle. First comes the cable manager 1, then follows the patch panel 1, cable manager 2, switch 1, cable manager 3 and switch 2, with all the connectors on the back side of the patch panel cabinet. All gadgets ready, we can go on with the cabling. The patch panel here can be fibre or copper patch panel.

patch panel cabinet

The importance of a patch panel cabinet is no less than that of a tiny screw or a nail. And great attention should be focused on it since the patch panel cabinet can support the other device and prevent them from external damages. A solid and durable patch panel cabinet is necessary, which is actually what FS.COM aims at. There are 9U and 12U, two choices for you to meet different application. To ensure the best performance, 1 bag of nuts and bolts, 1 T-Shaped Lever will be offered for free. And there are so many surprises in the patch panel cabinet that I want to leave it for you to find yourselves. You will find them when installing and using the patch panel cabinet from FS.COM.

Collections of Cable Manager for Rack

Introduction

Long before the born of cable manager, the mess cable management with cables hanging here and there has been a cloud over the data centre and server room. How can you realize each smooth and convenient operation on your network application with network cables looking like messy spaghetti? Here we list four common cable managers to simplify your cabling and minimize the trouble during operation.

Different Types of Cable Manager

The following cable managers which you may have heard of or seen before are the most popular types in the market. Each has its unique design and characteristics.

Cable Manager with Brush Strip

The panel is designed to be mounted on any 19in EIA style rack or cabinet and features built-in brush that allows passage of up to 25 cables while blocking airflow, ensuring optimal thermal performance. The steel construction provides durability, resists corrosion, and keeps your rack looking smooth and professional.

cable manager with brush strip

Cable Manager with Finger Duct

The FS.COM finger duct horizontal cable manager is designed with flexible fingers, rear pass-through holes and a removable cover. The soft and durable finger ducts offer proper bend radius and flexible operation of cable management, keeping the structured cabling system unhurt and totally functional.

cable manager with finger duct

Cable Manager with D-rings

The name of D-rings cable manager originates from the fact that five metal D-rings stand vertically on the cable management panel in a good order. Horizontal cable management panels with D Rings are built with steel for strength and durability. Easily route large amounts of cable through robust rings. The D-Rings organize patch cords and maintain a required bend radius. They are available in sizes of 1U and 2U.

cable manager with D-rings

Cable Manager with Bend Radius Finger

This cable manager is equipped with six or five bend radius control fingers, consuming much fewer material. The total length of it is 222mm. Light in weight, this type of bracket can be installed in specific areas of the rack, rather than along its entire height. Moreover, it can be stacked to reach any height(U), so it can be an alternative of higher vertical cable management.

cable manager with bend radius finger

How to Apply Cable Manager

Cable managers often come together with patch panel to make the patch cables in the front side of patch panel more orderly. Generally, in a server rack, the cable can’t either be put solely on cable manager since it is incompetent for termination, or be applied to just a patch panel due to its imperfect cable management. Therefore, to realize the perfect cable management, we need to deploy this couple at the same time. The cables going out from the patch panel have already gone through the management process, but it should go to the next cable manager installed above or below the patch panel, so that the whole cable management can be finished. Additionally, some people will need the further step to bring the cables that are from horizontal cable management to the vertical cable managers standing at the both sides of the cabinet.

Conclusion

Never look down upon cable management, otherwise the cables haphazardly thrown around will be your nightmare. In case it damages the wires and cause other hazards, now it’s time to arrange your cables properly. FS.COM has many kinds of cable managers to help make your life neater!