The patch panel, a significant element in cabling design, has many ports on it. Through these ports, the cables are located elsewhere in your building. Patch panel at present has fibre and copper patch panel(also known as Ethernet patch panel), two choices for us. As we all know, a single fibre optic patch panel is not available to all kinds of fibre cables. The same is to copper patch panels which are classified as Cat5e patch panel, Cat6 patch panel and so on.
CAT5e Ethernet Patch Panel VS. CAT6 Ethernet Patch Panel
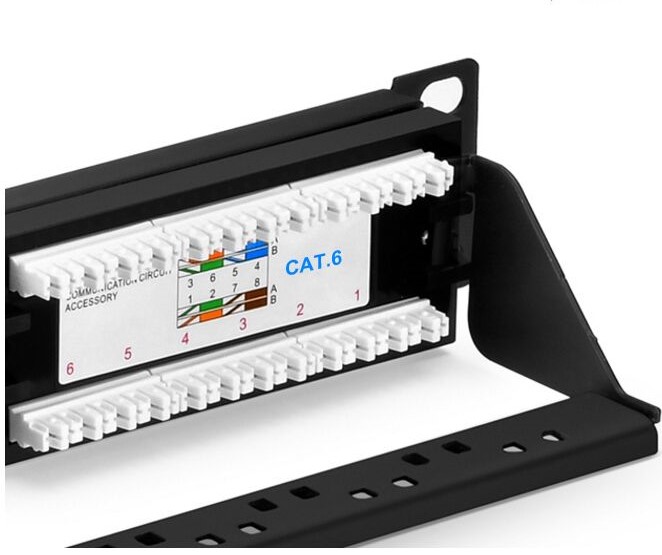
Both as the copper patch panel, Cat5e patch panel and Cat6 patch panel don’t have many differences, except that Cat5e patch panel usually works with Cat5e, while Cat6 patch panel can work with both the corresponding Cat6 cable and any earlier generation of Cat cable. The patch panels themselves don’t have many practical differences. However, there is indeed a difference in the wire gauge specified between Cat5e and Cat6. The cat6 wire is thicker in that Cat6 usually has 23 AWG copper conductors compared to only 24 AWG in Cat5e cable.
The 24 port patch panel used for different cables are both welcomed by customers. 24 port cat6 patch panel offered by FS.COM acquires acknowledgments from many customers and IT experts. With easy installation and top-quality performance, the high quality patch panel is designed for Fast Ethernet applications. 24-port Cat5e patch panel is the most popular in the market, which has punch down and feed-through patch panel for customer choice. And when applying patch panels to special environments, for example nearby motors, generators, air conditioners, and even office mainstays such as fluorescent lights and printers, you should carefully consider between shielded and unshielded patch panels.
Shielded Ethernet Patch Panel VS. Unshieleded Ethernet Patch Panel
Shielded and unshielded patch panels are required to match with the shielded and unshielded copper cable applications. Shielded patch panels are designed for high EMI (Electro Magnetic Interference) environments. If the application environments have special requirements for crosstalk and EMI functions, especially when the copper cable runs near power cables then you should choose to use shielded Ethernet cables with shielded patch panels. However, someone may wonder whether they can use unshielded patch panel for shielded cable. To be honest, it depends on the environment in which your cable will run through. If the place has no high power electrical wires, you can go with unshielded patch panel. On the flip side, if you are in a noisy environment like using arc welders or near high power radio transmitters, then you’d better select the shielded one. FS.COM shielded and unshielded patch panels can meet not only 1G network speed, but also 10G network.
For both shielded and unshielded applications, you can find what you need at FS.COM. The port number marked on the FS.COM patch panel provides easy cable identification. The cable manager on the rear side is removable, providing efficient and organized cabling.
Conclusion
CAT5e and CAT6 cables are the most popular Ethernet cables on the market. To create a nicely organized cabling environment, choosing the right patch panel is essential. Sometimes Cat5e, Cat6 or other Ethernet cables need to be managed in a single panel, in this type of situation, the blank keystone patch panels can support mixed cabling with installation of different rj45 insert modules. In addition, you can customise your patch panel according to your specific applications. FS.COM provides a large variety of patch panels and Ethernet cable and also presents a selection of cable managers to help you create your ideal cabling network. For more details, please visit our website.